 Repair Your Unreadable PDF Documents
So, you finally faced this problem. The PDF file you need now became unreadable and does not open by any standard means, neither in a browser, nor in Acrobat Reader. Most likely, you see a message telling you what’s the problem. “The file is damaged” or “There was a problem reading this document” or anything else. But here is the interesting thing: these error message do not tell you how to fix the problem you encountered. Ok, the PDF is damaged, so what should I do? You should download Recovery Toolbox for PDF, that’s what.
This all-in-one recovery instrument makes sure your unreadable and not opening PDF file works again. The tool is completely automatic, so you don’t have to study the error yourself, nor do you need any specific skills beyond the very basic computer knowledge. And of course no registry editing or binary hacks are required too.
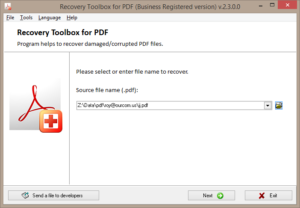
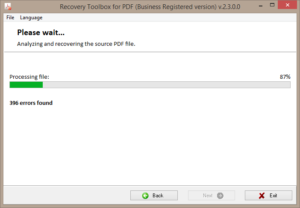
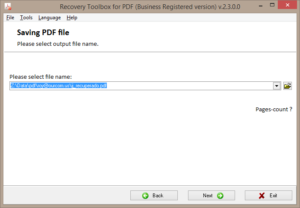
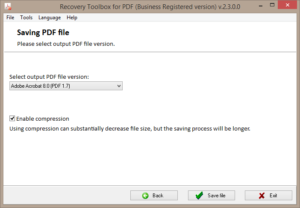
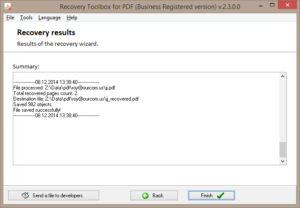
Recovery Toolbox for PDF does everything for you: it analyzes the input PDF file, scans for structural and format damages, fixes them and allows you to pick the file name and the desired PDF format version to save the repaired document. Yummy!
What kind of errors can Recovery Toolbox for PDF handle?
Almost any of them, as long as the data are still present in the file. Probably you didn’t know that PDF format has different versions, but nevertheless, the application supports all of them. And whatever the problem with the file is, Recovery Toolbox for PDF identifies it and applies necessary fixes.
In particular, the program recognizes and repairs the following errors: “error opening the document”, “error processing the page”, “unrecognized token”, “the file is corrupt”, “the file is damaged”, “format error:” and dozens of others. Even if Acrobat Reader itself does not know what the problem is and directly says “Unknown error”, chances are Recovery Toolbox for PDF can locate and eliminate this error. And again, the process is automatic.
Optimize PDF documents to prevent potential failures
Hundreds of applications can work with PDF files. And not all of them stringently follow Adobe’s guidelines when writing PDF. The result is an error-prone document that currently does open, but as the number of those little glitches produced by third-party PDF editors grows, the PDF file eventually fails to read and shows an error. Oops!
To prevent such potential problems, Recovery Toolbox for PDF features an intelligent proprietary analysis engine that not only fixes existing problems, but also repairs logical and structural errors caused by editing the PDF file by non-compliant applications.
Turn erroneous PDF documents to healthy ones in minutes
As said above, Recovery Toolbox for PDF cures a lot of damages, regardless of whether they were caused by software or hardware failure. It produces a healthy, completely working PDF file in just a few minutes. You can view and edit such a fixed file just like it never had problems.
The repair process is fast and automated, requiring you only to select the damaged PDF and then save the fixed one in the desired file format. That’s it. All the analysis and repairing is completely automatic. By the way, you can output the ready document as a compressed or uncompressed PDF file.
Lightweight, fast, standalone
Recovery Toolbox for PDF does not need any Adobe components to be installed in your system. You only need your corrupted document and the program itself. And installer is extremely lightweight and it downloads in less than a minute on a broadband connection. Finally, repairing even a weighty PDF document does not take too long thanks to the well-optimized analysis engine. Usually, you hear something like “run this tool and take a coffee break”. But in case of Recovery Toolbox for PDF, you won’t have time for coffee, as your PDF document will be restored long before you finish brewing a cup of coffee.
Get PDF Repair Utility Now
Download PDF Repair tool for Windows and try it free of charge or go ahead and get registered.
Perform the following easy steps to uninstall Recovery Toolbox for PDF
In case if you want to remove the Recovery Toolbox for PDF automatically:
- Open the Control Panel (it is usually available from the Start menu)
- Click "Programs" then "Uninstall a program" in the
Control Panel settings
(this item may have name "Programs and Features" depending on selected View) - Select the Recovery Toolbox for PDF in the appeared "Uninstall or change a program" list
- Click "Uninstall" (or "Uninstall/Change") in the menu placed over the list of installed programs
- Confirm the removal
- You may need to perform additional steps to remove the software. The system will ask you if needed.
In case if you wish to remove the Recovery Toolbox for PDF manually:
You may need to use such method in case if the system is working unstable or the automatic method won't work.
- Log on to the Windows system as an User with Administrator privileges
- Run the Windows Files Explorer (you may use Win+E keys combination for
this)
Navigate to the topmost directory where the main program files folder was created during the installation
(most used is "Program Files" or "Program Files (x86)" directories so you may use %PROGRAMFILES%
environment variable to navigate into the Program Files directory: simple type in %PROGRAMFILES%
into the address field of the Files Explorer and press Enter key). - Select the the Recovery Toolbox for PDF program directory (click to it's name once)
- Delete the entire Recovery Toolbox for PDF directory from the Program Files
- Repeat the same for other files related to the Recovery Toolbox for PDF
* - be careful to not delete the system or other vital files.
Additional Information
- System Requirements: Microsoft Windows
- Trial Limitations: Demo saves only first page of recovered PDF file
Perform the following easy steps to uninstall [product_name]
In case if you want to remove the [product_name] automatically:
- Open the Control Panel (it is usually available from the Start menu)
- Click "Programs" then "Uninstall a program" in the
Control Panel settings
(this item may have name "Programs and Features" depending on selected View) - Select the [product_name] in the appeared "Uninstall or change a program" list
- Click "Uninstall" (or "Uninstall/Change") in the menu placed over the list of installed programs
- Confirm the removal
- You may need to perform additional steps to remove the software. The system will ask you if needed.
In case if you wish to remove the [product_name] manually:
You may need to use such method in case if the system is working unstable or the automatic method won't work.
- Log on to the Windows system as an User with Administrator privileges
- Run the Windows Files Explorer (you may use Win+E keys combination for
this)
Navigate to the topmost directory where the main program files folder was created during the installation
(most used is "Program Files" or "Program Files (x86)" directories so you may use %PROGRAMFILES%
environment variable to navigate into the Program Files directory: simple type in %PROGRAMFILES%
into the address field of the Files Explorer and press Enter key). - Select the the [product_name] program directory (click to it's name once)
- Delete the entire [product_name] directory from the Program Files
- Repeat the same for other files related to the [product_name]
* - be careful to not delete the system or other vital files.









Leave a Comment
You must be logged in to post a comment.